Language
Recording: Double Tracking Guitar
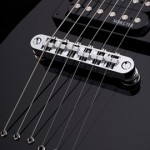
[caption id="attachment_1314" align="alignright" width="300"] Double tracking is essentially exactly what it sounds like -- recording the same part twice and panning each out to opposite sides.[/caption]
A normal complaint with many guitarists and home studio musicians trying to record that old six-string is that often times the guitar parts are just not as big as they’d hoped for. And what exactly is a big guitar sound anyway? Is it something so prominent that it stands out above the rest of the mix? Maybe it’s something that most people will hear as full? The way to achieve that big sound is by way of double tracking. Even if you’re not one of those people aiming for something “big,” double tracking in a studio setting is a widely used technique that has been around since pretty much the beginning of the professional recording studio. Producers working with traditional “big bands” or full orchestras would regularly double up on the horn section in order to give it a much more complete feel. Pop artists such as the Beatles used it time and time again on not just their instruments but their vocals as well.
Before We Get Started...
For those of you out there unaware, double tracking is essentially exactly what it sounds like; recording the same part twice and panning each out to opposite sides. By double tracking, you’ll be able to give your project a wide stereo spread that can add a unique flavor aided by the specific little differences in the timing and dynamics of each performance. As far as guitars go, this entails a guitarist playing a section of the song perfectly and then repeating it as closely as possible on a second track. This should not be confused with other studio techniques such as recording in stereo, using two mics, using a chorus effect or duplicating and delaying one side (the last of which is how the early Beatles mono records were converted to “stereo”). While some of these techniques can reproduce some of the added flavor of double tracking, I myself – as well as plenty others – feel like they are more of a quick knock off of the real deal as there is simply no substitution for an expertly performed double track. Alright, now that we got that out of the way, let’s get right to it!
Double Tracking
When it comes down to it, the idea of double tracking isn’t the hard part – it’s getting everything down correctly that’s easier said than done. You are essentially trying to get down an exact recreation of a specific performance using the not always precise human hand, and although I did say earlier that these little differences between the two tracks is what gives double tracking its appeal, too much difference and it just won’t sound right. But before we go into some of the common problems associate with double tracking and how to avoid and/or fix them, let’s take a look at the steps involved in double tracking which as you’ll see is pretty straight forward.
Step 1 – Record a Mono Guitar Track: You can do this any way you’re used to recording a guitar track, be it amp to mic or DI using amp modelers. It’s very important that you get this track down as tight as possible – the more mistakes on this track the harder it will be to get the second one down right. Keep this track panned dead center for now. I tend to have the drum track for the song already recorded since I find playing along with a drum kit much easier than with a metronome so that might be something you should consider if you’re having trouble keeping correct timing.
Step 2 – Edit: Any extra fills and licks that you feel like double tracking should be added now – whether or not you want these extras on their own track is up to you. Once you have all of these extra parts done, again, make sure you fix all of the timing issues that you hear. Once you’re done editing, pan your track – or tracks – all the way to the left.
Step 3 – Repeat: Using the same guitar with the same pickups and the same effects, amps, mics, settings etc., record your guitar track(s) as identical to the first one as possible. Changing anything on this second track from the first one might give you increased stereo width but will most likely result in uneven tone so it’s important that the two tracks have as little difference between them as possible. Pan the track(s) all the way to the left.
In order to give your double tracked guitar a consistent and balanced sound, it’s important that everything be double tracked – specifically the extra fills and licks that you threw in there. Even if you don’t realize it now you’ll be sure to hear the difference between a lick that has been double tracked as opposed to one that is simply panned center. It sounds empty compared to the doubled parts and will most likely stand out – and not in the good way. If you have two guitarists playing different fills, make sure they play each of their parts twice. This means that even in a simple song where you might only have one or two licks and fills, you can easily end up with 8 tracks or more once everything has been doubled. If there is too much difference between your two tracks you will hear a kind of back and forth, ping pong type of bouncing effect that doesn’t sound particularly good. If you have a pair of good quality headphones, I suggest you check out the double tracked parts with them since the annoying oscillating effect stands out much more through phones.
As far as guitar solos go, if it’s not a particularly tough one, you can go ahead and double track that as well but for the most part, a single tracked solo panned to the center can be made to pop out using different techniques so you don’t necessarily have to double it if you don’t want to (or can’t). And one more thing – you don’t have to stop at two; triple, quad or even deca tracking is very possible and works pretty much the same way. The only thing is the more tracks you have to work with, the harder it is to keep each in sync with each other.
Double tracking is essentially exactly what it sounds like -- recording the same part twice and panning each out to opposite sides.[/caption]
A normal complaint with many guitarists and home studio musicians trying to record that old six-string is that often times the guitar parts are just not as big as they’d hoped for. And what exactly is a big guitar sound anyway? Is it something so prominent that it stands out above the rest of the mix? Maybe it’s something that most people will hear as full? The way to achieve that big sound is by way of double tracking. Even if you’re not one of those people aiming for something “big,” double tracking in a studio setting is a widely used technique that has been around since pretty much the beginning of the professional recording studio. Producers working with traditional “big bands” or full orchestras would regularly double up on the horn section in order to give it a much more complete feel. Pop artists such as the Beatles used it time and time again on not just their instruments but their vocals as well.
Before We Get Started...
For those of you out there unaware, double tracking is essentially exactly what it sounds like; recording the same part twice and panning each out to opposite sides. By double tracking, you’ll be able to give your project a wide stereo spread that can add a unique flavor aided by the specific little differences in the timing and dynamics of each performance. As far as guitars go, this entails a guitarist playing a section of the song perfectly and then repeating it as closely as possible on a second track. This should not be confused with other studio techniques such as recording in stereo, using two mics, using a chorus effect or duplicating and delaying one side (the last of which is how the early Beatles mono records were converted to “stereo”). While some of these techniques can reproduce some of the added flavor of double tracking, I myself – as well as plenty others – feel like they are more of a quick knock off of the real deal as there is simply no substitution for an expertly performed double track. Alright, now that we got that out of the way, let’s get right to it!
Double Tracking
When it comes down to it, the idea of double tracking isn’t the hard part – it’s getting everything down correctly that’s easier said than done. You are essentially trying to get down an exact recreation of a specific performance using the not always precise human hand, and although I did say earlier that these little differences between the two tracks is what gives double tracking its appeal, too much difference and it just won’t sound right. But before we go into some of the common problems associate with double tracking and how to avoid and/or fix them, let’s take a look at the steps involved in double tracking which as you’ll see is pretty straight forward.
Step 1 – Record a Mono Guitar Track: You can do this any way you’re used to recording a guitar track, be it amp to mic or DI using amp modelers. It’s very important that you get this track down as tight as possible – the more mistakes on this track the harder it will be to get the second one down right. Keep this track panned dead center for now. I tend to have the drum track for the song already recorded since I find playing along with a drum kit much easier than with a metronome so that might be something you should consider if you’re having trouble keeping correct timing.
Step 2 – Edit: Any extra fills and licks that you feel like double tracking should be added now – whether or not you want these extras on their own track is up to you. Once you have all of these extra parts done, again, make sure you fix all of the timing issues that you hear. Once you’re done editing, pan your track – or tracks – all the way to the left.
Step 3 – Repeat: Using the same guitar with the same pickups and the same effects, amps, mics, settings etc., record your guitar track(s) as identical to the first one as possible. Changing anything on this second track from the first one might give you increased stereo width but will most likely result in uneven tone so it’s important that the two tracks have as little difference between them as possible. Pan the track(s) all the way to the left.
In order to give your double tracked guitar a consistent and balanced sound, it’s important that everything be double tracked – specifically the extra fills and licks that you threw in there. Even if you don’t realize it now you’ll be sure to hear the difference between a lick that has been double tracked as opposed to one that is simply panned center. It sounds empty compared to the doubled parts and will most likely stand out – and not in the good way. If you have two guitarists playing different fills, make sure they play each of their parts twice. This means that even in a simple song where you might only have one or two licks and fills, you can easily end up with 8 tracks or more once everything has been doubled. If there is too much difference between your two tracks you will hear a kind of back and forth, ping pong type of bouncing effect that doesn’t sound particularly good. If you have a pair of good quality headphones, I suggest you check out the double tracked parts with them since the annoying oscillating effect stands out much more through phones.
As far as guitar solos go, if it’s not a particularly tough one, you can go ahead and double track that as well but for the most part, a single tracked solo panned to the center can be made to pop out using different techniques so you don’t necessarily have to double it if you don’t want to (or can’t). And one more thing – you don’t have to stop at two; triple, quad or even deca tracking is very possible and works pretty much the same way. The only thing is the more tracks you have to work with, the harder it is to keep each in sync with each other.
 Double tracking is essentially exactly what it sounds like -- recording the same part twice and panning each out to opposite sides.[/caption]
A normal complaint with many guitarists and home studio musicians trying to record that old six-string is that often times the guitar parts are just not as big as they’d hoped for. And what exactly is a big guitar sound anyway? Is it something so prominent that it stands out above the rest of the mix? Maybe it’s something that most people will hear as full? The way to achieve that big sound is by way of double tracking. Even if you’re not one of those people aiming for something “big,” double tracking in a studio setting is a widely used technique that has been around since pretty much the beginning of the professional recording studio. Producers working with traditional “big bands” or full orchestras would regularly double up on the horn section in order to give it a much more complete feel. Pop artists such as the Beatles used it time and time again on not just their instruments but their vocals as well.
Before We Get Started...
For those of you out there unaware, double tracking is essentially exactly what it sounds like; recording the same part twice and panning each out to opposite sides. By double tracking, you’ll be able to give your project a wide stereo spread that can add a unique flavor aided by the specific little differences in the timing and dynamics of each performance. As far as guitars go, this entails a guitarist playing a section of the song perfectly and then repeating it as closely as possible on a second track. This should not be confused with other studio techniques such as recording in stereo, using two mics, using a chorus effect or duplicating and delaying one side (the last of which is how the early Beatles mono records were converted to “stereo”). While some of these techniques can reproduce some of the added flavor of double tracking, I myself – as well as plenty others – feel like they are more of a quick knock off of the real deal as there is simply no substitution for an expertly performed double track. Alright, now that we got that out of the way, let’s get right to it!
Double Tracking
When it comes down to it, the idea of double tracking isn’t the hard part – it’s getting everything down correctly that’s easier said than done. You are essentially trying to get down an exact recreation of a specific performance using the not always precise human hand, and although I did say earlier that these little differences between the two tracks is what gives double tracking its appeal, too much difference and it just won’t sound right. But before we go into some of the common problems associate with double tracking and how to avoid and/or fix them, let’s take a look at the steps involved in double tracking which as you’ll see is pretty straight forward.
Step 1 – Record a Mono Guitar Track: You can do this any way you’re used to recording a guitar track, be it amp to mic or DI using amp modelers. It’s very important that you get this track down as tight as possible – the more mistakes on this track the harder it will be to get the second one down right. Keep this track panned dead center for now. I tend to have the drum track for the song already recorded since I find playing along with a drum kit much easier than with a metronome so that might be something you should consider if you’re having trouble keeping correct timing.
Step 2 – Edit: Any extra fills and licks that you feel like double tracking should be added now – whether or not you want these extras on their own track is up to you. Once you have all of these extra parts done, again, make sure you fix all of the timing issues that you hear. Once you’re done editing, pan your track – or tracks – all the way to the left.
Step 3 – Repeat: Using the same guitar with the same pickups and the same effects, amps, mics, settings etc., record your guitar track(s) as identical to the first one as possible. Changing anything on this second track from the first one might give you increased stereo width but will most likely result in uneven tone so it’s important that the two tracks have as little difference between them as possible. Pan the track(s) all the way to the left.
In order to give your double tracked guitar a consistent and balanced sound, it’s important that everything be double tracked – specifically the extra fills and licks that you threw in there. Even if you don’t realize it now you’ll be sure to hear the difference between a lick that has been double tracked as opposed to one that is simply panned center. It sounds empty compared to the doubled parts and will most likely stand out – and not in the good way. If you have two guitarists playing different fills, make sure they play each of their parts twice. This means that even in a simple song where you might only have one or two licks and fills, you can easily end up with 8 tracks or more once everything has been doubled. If there is too much difference between your two tracks you will hear a kind of back and forth, ping pong type of bouncing effect that doesn’t sound particularly good. If you have a pair of good quality headphones, I suggest you check out the double tracked parts with them since the annoying oscillating effect stands out much more through phones.
As far as guitar solos go, if it’s not a particularly tough one, you can go ahead and double track that as well but for the most part, a single tracked solo panned to the center can be made to pop out using different techniques so you don’t necessarily have to double it if you don’t want to (or can’t). And one more thing – you don’t have to stop at two; triple, quad or even deca tracking is very possible and works pretty much the same way. The only thing is the more tracks you have to work with, the harder it is to keep each in sync with each other.
Double tracking is essentially exactly what it sounds like -- recording the same part twice and panning each out to opposite sides.[/caption]
A normal complaint with many guitarists and home studio musicians trying to record that old six-string is that often times the guitar parts are just not as big as they’d hoped for. And what exactly is a big guitar sound anyway? Is it something so prominent that it stands out above the rest of the mix? Maybe it’s something that most people will hear as full? The way to achieve that big sound is by way of double tracking. Even if you’re not one of those people aiming for something “big,” double tracking in a studio setting is a widely used technique that has been around since pretty much the beginning of the professional recording studio. Producers working with traditional “big bands” or full orchestras would regularly double up on the horn section in order to give it a much more complete feel. Pop artists such as the Beatles used it time and time again on not just their instruments but their vocals as well.
Before We Get Started...
For those of you out there unaware, double tracking is essentially exactly what it sounds like; recording the same part twice and panning each out to opposite sides. By double tracking, you’ll be able to give your project a wide stereo spread that can add a unique flavor aided by the specific little differences in the timing and dynamics of each performance. As far as guitars go, this entails a guitarist playing a section of the song perfectly and then repeating it as closely as possible on a second track. This should not be confused with other studio techniques such as recording in stereo, using two mics, using a chorus effect or duplicating and delaying one side (the last of which is how the early Beatles mono records were converted to “stereo”). While some of these techniques can reproduce some of the added flavor of double tracking, I myself – as well as plenty others – feel like they are more of a quick knock off of the real deal as there is simply no substitution for an expertly performed double track. Alright, now that we got that out of the way, let’s get right to it!
Double Tracking
When it comes down to it, the idea of double tracking isn’t the hard part – it’s getting everything down correctly that’s easier said than done. You are essentially trying to get down an exact recreation of a specific performance using the not always precise human hand, and although I did say earlier that these little differences between the two tracks is what gives double tracking its appeal, too much difference and it just won’t sound right. But before we go into some of the common problems associate with double tracking and how to avoid and/or fix them, let’s take a look at the steps involved in double tracking which as you’ll see is pretty straight forward.
Step 1 – Record a Mono Guitar Track: You can do this any way you’re used to recording a guitar track, be it amp to mic or DI using amp modelers. It’s very important that you get this track down as tight as possible – the more mistakes on this track the harder it will be to get the second one down right. Keep this track panned dead center for now. I tend to have the drum track for the song already recorded since I find playing along with a drum kit much easier than with a metronome so that might be something you should consider if you’re having trouble keeping correct timing.
Step 2 – Edit: Any extra fills and licks that you feel like double tracking should be added now – whether or not you want these extras on their own track is up to you. Once you have all of these extra parts done, again, make sure you fix all of the timing issues that you hear. Once you’re done editing, pan your track – or tracks – all the way to the left.
Step 3 – Repeat: Using the same guitar with the same pickups and the same effects, amps, mics, settings etc., record your guitar track(s) as identical to the first one as possible. Changing anything on this second track from the first one might give you increased stereo width but will most likely result in uneven tone so it’s important that the two tracks have as little difference between them as possible. Pan the track(s) all the way to the left.
In order to give your double tracked guitar a consistent and balanced sound, it’s important that everything be double tracked – specifically the extra fills and licks that you threw in there. Even if you don’t realize it now you’ll be sure to hear the difference between a lick that has been double tracked as opposed to one that is simply panned center. It sounds empty compared to the doubled parts and will most likely stand out – and not in the good way. If you have two guitarists playing different fills, make sure they play each of their parts twice. This means that even in a simple song where you might only have one or two licks and fills, you can easily end up with 8 tracks or more once everything has been doubled. If there is too much difference between your two tracks you will hear a kind of back and forth, ping pong type of bouncing effect that doesn’t sound particularly good. If you have a pair of good quality headphones, I suggest you check out the double tracked parts with them since the annoying oscillating effect stands out much more through phones.
As far as guitar solos go, if it’s not a particularly tough one, you can go ahead and double track that as well but for the most part, a single tracked solo panned to the center can be made to pop out using different techniques so you don’t necessarily have to double it if you don’t want to (or can’t). And one more thing – you don’t have to stop at two; triple, quad or even deca tracking is very possible and works pretty much the same way. The only thing is the more tracks you have to work with, the harder it is to keep each in sync with each other.